E-simi käsitsi paigaldamine ja aktiveerimise sammud Androidi jaoks
Welcome to SimAbove eSIM
Activating your eSIM is quick and easy, and we’re here to guide you every step of the way. With our straightforward installation process, you’ll be connected in no time. There’s no need to worry—if you face any challenges or have questions, the SimAbove support team is always ready to assist you.
Your seamless travel experience is our priority, so relax and enjoy the convenience of SimAbove eSIM!
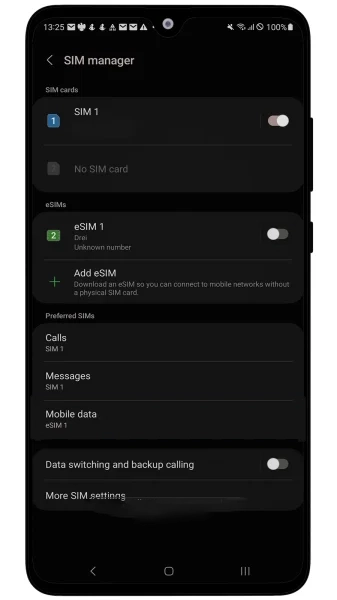
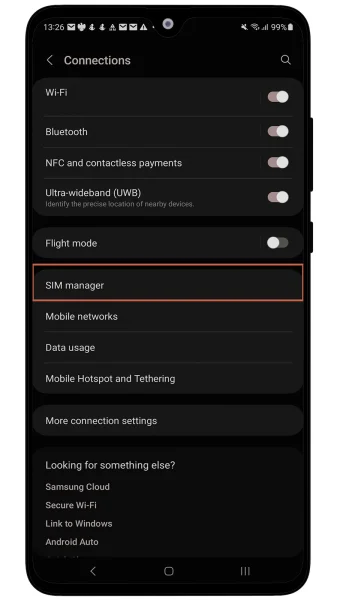
Mine Seaded > Ühendused

Press SIM Managaer
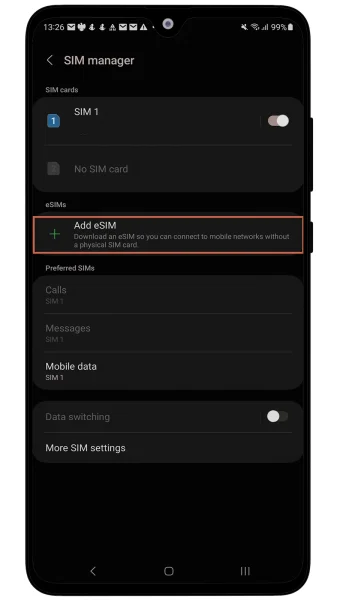
Vajutage Add eSIM
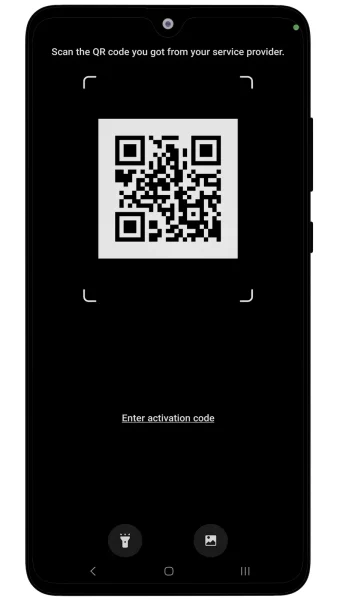
Vajutage QR-koodi skaneerimist
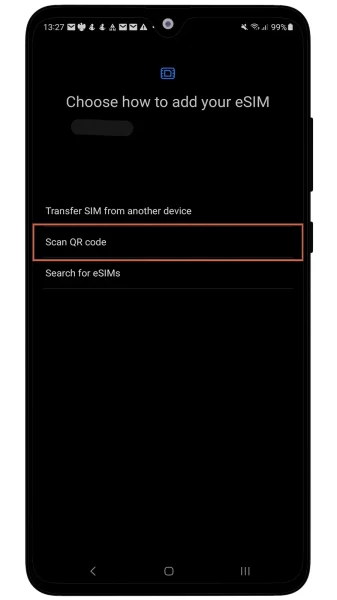
Skaneeri QR-koodi vorm E-post
You’re almost there—just two more steps, and you’ll be connected! 🎉
Congratulations on the progress you’ve made so far. You’re doing great!
At this rate, you’ll soon be a master of installing eSIMs. Who knows? Maybe next time, you’ll be helping your friends save money with SimAbove eSIM too! 😄 Let’s get you connected so you can enjoy the benefits of your eSIM in no time. 🚀
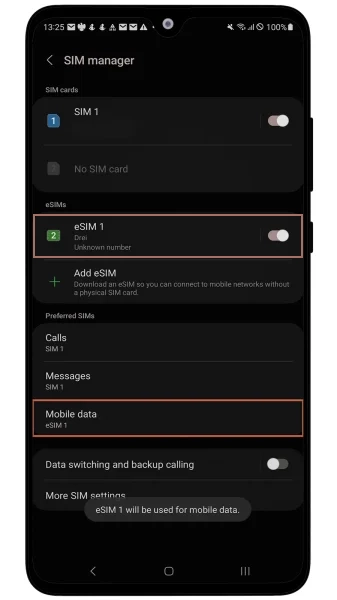
Mine Seaded > Ühendused > SIM Manager ja veendu, et SimAbove loodud eSIM on sisse lülitatud ja mobiilne andmeside on lülitatud samale eSIMile.
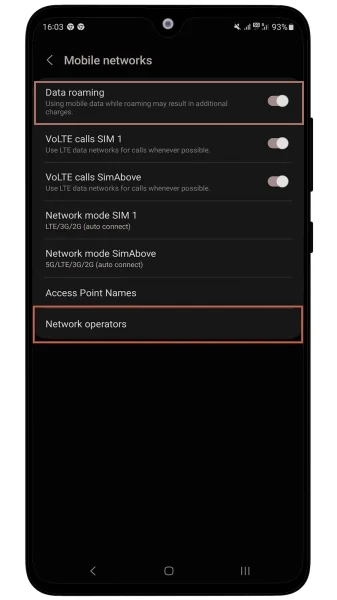
Avage Seaded > Ühendused > Mobiilsidevõrgud ja veenduge, et Andmerändlus on sisse lülitatud. Veenduge ka, et SimAbove eSIM-i all olevad võrguoperaatorid on seadistatud nii, et võrku ühendatakse automaatselt.
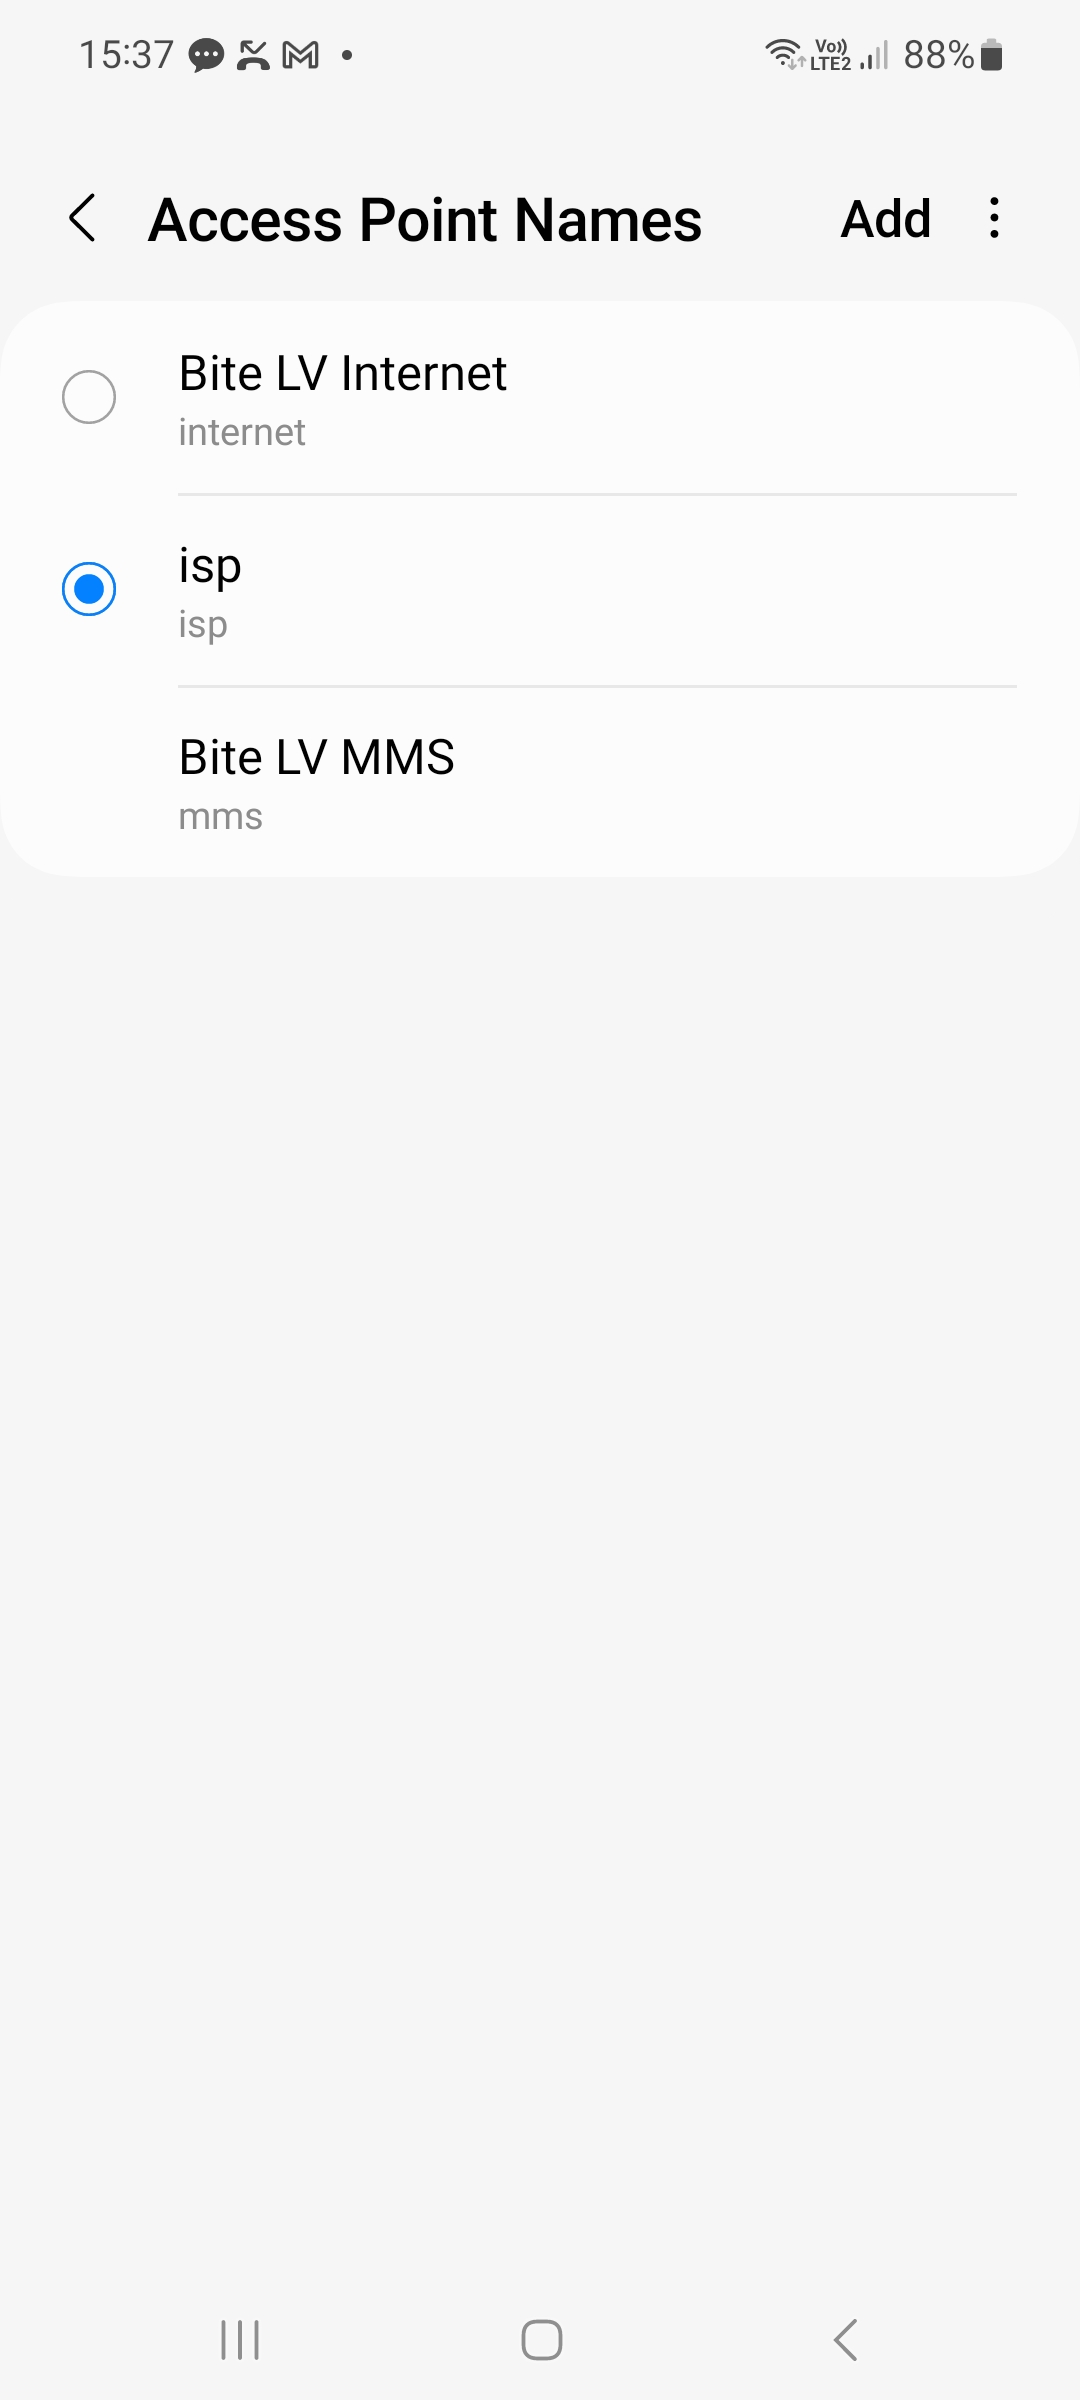
Avage Seaded ja otsige Access Point Names. Avage ja vajutage Add või +. Kirjutage jaotistesse nimi ja APN: isp ja vajutage tagasi. Ja valige äsja loodud APN.
Kui kõik sammud on tehtud õigesti, peaksite nägema 3G/4G/LTE/5G võrgu märki võrguribade kõrval üleval paremas nurgas. Seadme ühendamine võrku võib võtta kuni 15 minutit.