Manuālas eSIM Iestatīšanas un Aktivizācijas soļi Android
Welcome to SimAbove eSIM
Activating your eSIM is quick and easy, and we’re here to guide you every step of the way. With our straightforward installation process, you’ll be connected in no time. There’s no need to worry—if you face any challenges or have questions, the SimAbove support team is always ready to assist you.
Your seamless travel experience is our priority, so relax and enjoy the convenience of SimAbove eSIM!
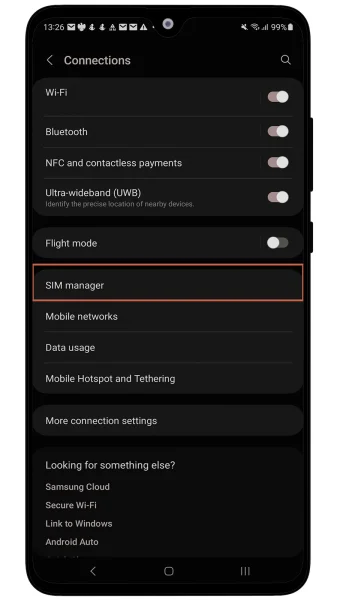
Dodies uz Iestatījumi > Savienojumi

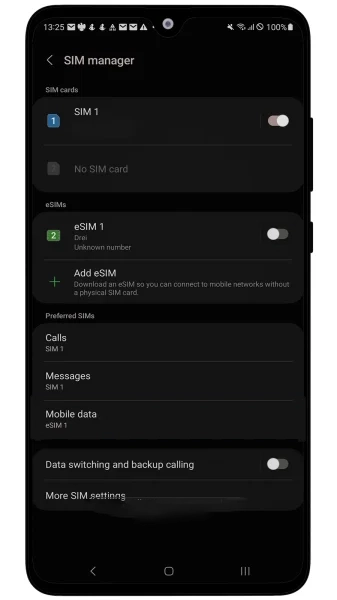
Spied SIM Pārvaldnieks
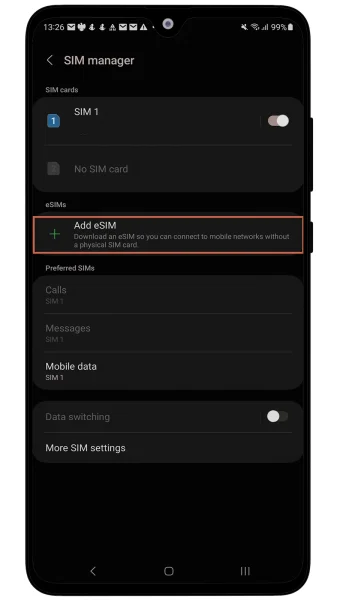
Spied Pievienot eSIM karti
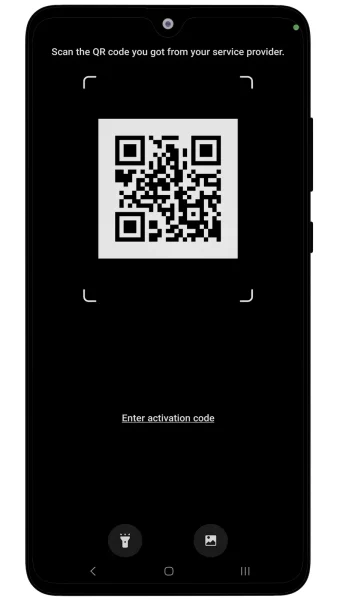
Spied Skenēt QR kodu
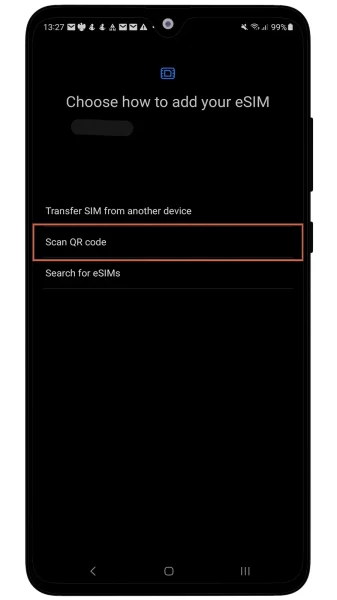
Skenē QR kodu no epasta
You’re almost there—just two more steps, and you’ll be connected! 🎉
Congratulations on the progress you’ve made so far. You’re doing great!
At this rate, you’ll soon be a master of installing eSIMs. Who knows? Maybe next time, you’ll be helping your friends save money with SimAbove eSIM too! 😄 Let’s get you connected so you can enjoy the benefits of your eSIM in no time. 🚀
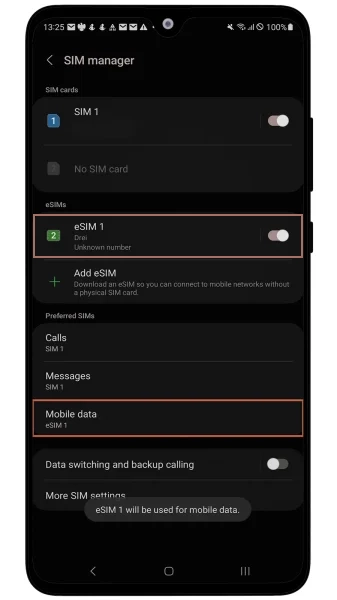
Dodies uz Iestatījumi > Savienojumi > SIM pārvaldnieks un pārliecinies, ka SimAbove izveidotā eSIM ir ieslēgta, kā arī pie Mobilie Dati ir izvēlēta tā pati eSIM.
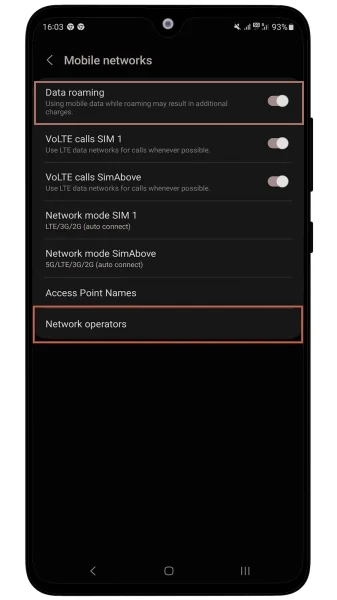
Dodies uz Iestatījumi > Savienojumi > Mobilie tīkli un pārliecinieties, ka Datu viesabonēšana ir IESLĒGTA. Pārliecinieties arī, ka SimAbove eSIM Tīkla operatoru izvēle ir iestatīta uz automātiski.
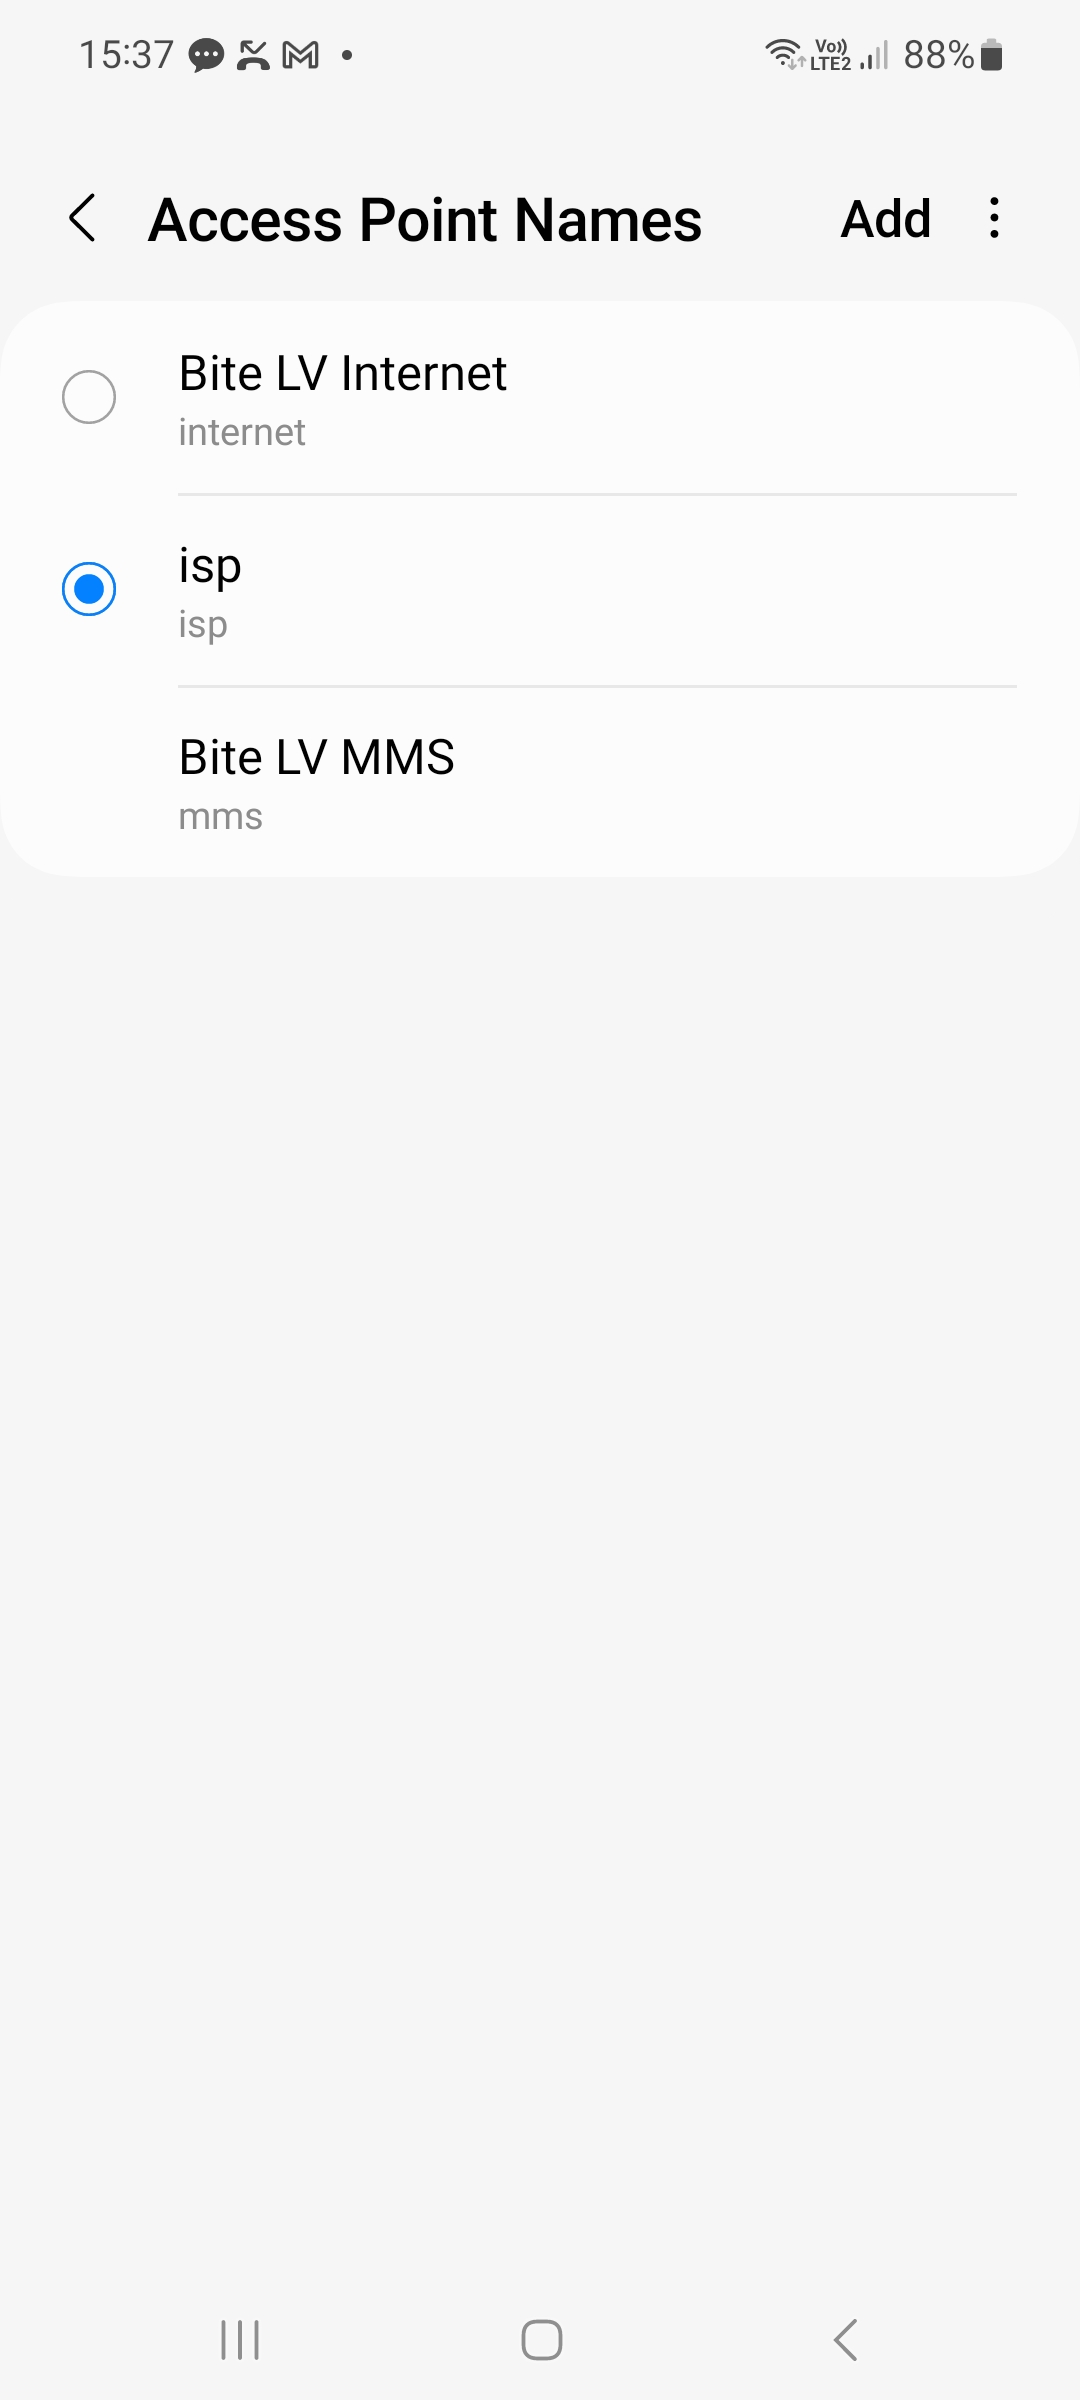
TIKAI TURCIJAS DIENAS PLĀNIEM! Dodamies uz Iestatījumi un meklētājā ierakstam Piekļuves punktu nosaukumi. Spiežam pievienot vai +. Pirmajā un otrajā ailē rakstam isp. Un spiežam pogu atpakaļ un izvēlamies šo.
Ja visas darbības tika veiktas pareizi, augšējā labajā stūrī vajadzētu redzēt 3G/4G/LTE/5G tīkla zīmei. Ierīces savienojuma izveide ar tīklu var ilgt līdz 15 minūtēm.